A big project like the master bath requires major demolition. Not only did all the fixtures, flooring, wallboard, and part of a wall need to come out, but our kitchen ceiling below ultimately needed to be completely removed to expose all of the plumbing that needed to be rerouted to accomplish the proper placement of the new plumbing in the master bath.
Another big obstacle was the soffit in the kitchen. We did not want it and our kitchen remodel would call to remove it. So, given that it was completely filled with plumbing and electrical it needed to be removed before we could continue with the master bath project.
Here is what it looked like:
 |
| I'm not sure they could have fit more plumbing or electrical into that soffit. |
 |
| Soffit ran all the way into the eat-in area of the kitchen over the sliding glass doors. Ugh. |
 |
| Steven is rerouting plumbing. He had already moved most of what was in the soffit and had torn much of the framing of the soffit out. We still had more demolition to go, but that could wait until we started the kitchen. |
The bathroom was completely torn out as well by this time:
 |
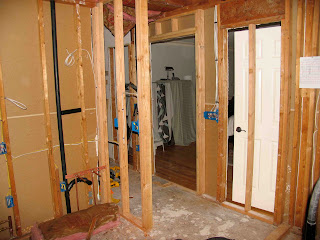
| Wall separating the closet from the bathroom was cut back to create opening which would later turn into a hallway. That metal air duct in the wall on the left side of the photo had to be moved. That was where our new door was going. |
 |
| This was the rough-in on the shower and some plumbing work was already in place. |
That air duct you see in the above photo could not be moved. We didn't really notice it was completely in the way of our original shampoo box plan. The drywall installers were coming in the morning, so this resulted in a late night design session to rework the placement of all the shampoo boxes and the hand-held shower as well. Glad we noticed the problem in time to fix it.
 |
| New doorway is framed in and rough-in electrical is in place. The T-wall is also framed in. To the left of it is where my vanity and sink will go. |
 |
| Rough-in plumbing is also in place. This is where Alan's vanity and sink will go. |
 |
| One of our ideas was to install recessed medicine cabinets over each sink. This did turn out to be a great idea. But, one of our lessons learned was not to frame them in advance as you see being done here. You just cannot judge center at this stage. Trust me. |
The plumbing took a long time to complete. So much rerouting was necessary both because we moved and upgraded every fixture in the bathroom and we wanted to remove that soffit in the kitchen to clear the way for that renovation. Our plumber was also limited to evenings and weekends due to his full time plumbing job. Our carpenter, also our neighbor, was likewise limited in schedule, but there was much less carpentry work needed. Finally, we did get to the drywall stage.
 |
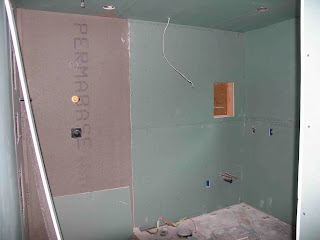
| We elected to use green board due to its moisture resistance. While unnecessary, we just continued it on the bedroom side of the wall. |
 |
| The shower was framed out in cement board. |
 |
| This is the side where my vanity and sink would go. |
 |
| The new entry and hallway was shaping up well. |
 |
| The window was one of the few elements to remain where it was. |
While all the plumbing was being done, use of our bedroom was impacted. We normally let our four cats into the room with us at night, but we had to curtail that because the bathroom was all open, including some of the floor for a time. I could just see one of those cats getting electrocuted, falling in between the wall studs, or even jumping down into the kitchen from one of those holes in the floor. Yikes.
This situation got Alan to thinking that their room is right next to ours and we could put in a door so that we could remove all the kitty litter boxes, food, and water out of our room completely. I was resistant at first. It would cost money, tear up the other side of the bedroom, and would it really fit and look right in the other room? After a little testing of the spacing, I warmed to the idea. It turned out to be brilliant. It did tear things up for a while, but it is perfect.
 |
| The demolition process began on the new door to the cat room. |
We still had the radiant heat to go in the bathroom and closet floors and then all the tile work for the shower and floor. The cabinets that we ordered at the beginning of the project were delivered and in the garage, so they were ready to do also. Stay tuned.


