Tuesday, March 31, 2015

The Great Outdoors

Once we got pretty far along in renovating the interior of our home, we ventured outside. Outdoor spaces have always been very challenging for us. First, there is way more outdoors than indoors to deal with. And, it keeps changing. The weather changes constantly, plants grow and die, weeds only grow, and there is wildlife out there that can cause damage. Also, working outdoors is hard and dirty. This isn't my happy place. But, the outside of our house could use some help and since we have been here for several years now my thoughts turned to curb appeal. Plus, we did find ourselves using the deck off the kitchen rather frequently and we just hated the view.

So, we set out to work on the yard. It is a big yard, at least for us, and needed a lot of improvement to match the standard we'd set inside. Our first thought was to look for outside help. Landscaping isn't something our neighbors seem to do, so we didn't have any easy referrals. After some online research we selected three candidates and started the process. We set up appointments with each to come to the house and talk about what we wanted and what they could do.

Now, this is where it gets difficult. We are pretty creative and have a lot of great ideas. I always try to temper this with a budget and I am quick to communicate the budget I had in mind to every contractor we talk with. I am hopeful that those professionals can balance the ideas we have with the budget we tell them. At the very least I expect to be told that our ideas are not feasible for our budget and get some help in focusing our efforts on what we could afford. Apparently, our ideas suggest that have way more money than we say we do.

Here is what we started with:

Back yard at the time we purchased the house.
Front yard at the time we purchased the house. I still shake my head as to why anyone would plant a specimen tree directly in front of the door . . .and then surround it with invasive shrubs.
This is the back deck. The view is not great and off to the right just past the frame of his photo, our neighbor's back deck is quite close.

The last time we did this process at our old house, the landscape companies did plans and then the cost of the plan was deducted from the total cost of the job, so if you bought the project, the plan was free. Here, you pay for the plans regardless. Paying for three sets of plans did not seem reasonable to me.

So, we started with one contractor and ordered the plans. Turnaround was pretty quick and here is what we got:


It had all the features we were looking for including a larger deck and a water feature. It also covered all the way around the house. It didn't address the rest of the yard, which would do little to improve the view from the back deck, nor did it do anything about that tree in front of the door. I'm told that tree is the most valuable item in our yard and we shouldn't try to move it. This plan was about 50% over budget. We did get a detailed estimate and a short timeline to complete the project.

I was not inspired by this plan. So, we moved on to contractor number 2. This group had great vision and their principles of natural design, native plants, and the ability to move that tree, were very attractive to us. We felt these folks thought like we did and we could work together. So, another plan was ordered. Based on the first plan we thought our budget was a little short, but we wanted to see what this group would do with it.

This plan was considerably more expensive and took longer to produce. Here is what we got:


Plans included detailed rendering of the back yard.

Now, that's what I'm talking about! It had everything. It did not come with an estimate, so the next step was to get that done. Now we saw the problem. It took forever to get an estimate from this group. When we finally got a number--and that is what it was--a number, not an estimate with a list of items. $250,000. I'm not making that up. As I pressed to understand what was included, it did not include the whole project. It did not include reworking the irrigation system, nor did it include moving that stupid tree. It didn't even include creating the access to the basement that the plan showed. I realized that this group was a "money is no object" contractor. Seriously, if money was no object we certainly wouldn't be living in this neighborhood.

We have now wasted over six months on trying to plan our landscaping. All we had to show for it was some drawings that we either weren't excited about or couldn't begin to afford. And, we spent money doing it! So, it is back to the drawing board. And, back to the process that works the best for us--doing our own design work.

Next post will show what we ended up doing. Spoiler alert: it turned out great, we spent less than our budget, but we didn't do the whole yard.

Sunday, September 16, 2012

Guest Room Update

When I posted the photos of the front guest bedroom, we really hadn't quite finished with the accessories. So, here are the update photos:


We added black and white photos, books, pillows, and a couple of more floral arrangements. We also refinished the little table to the left of the closet doors. It was a dark wood and we painted it black and sliver metallic. We also inserted an antique mirror into the top of it.
Before and after on the table.

Detail of the mirror on the top.
The room has already hosted two guests and is now ready for more.

Thursday, May 31, 2012

A Tale of Two Guest Rooms

After a long renovation process you really do lose some enthusiasm for creating new projects. But, the serial renovator is never cured, just in remission. Even though we are thrilled with the results, the kitchen/laundry room took a lot out of us (and our bank account). So, we took a long break and then we were once again triggered by the desire to improve our spaces. This time it was the two guest bedrooms. One had been set up as a guest room, at least it had the appropriate furniture, ever since we moved in and the other had always been a storage room, in fact serving as our master closet for about four months while we were doing the master bath.

Here are the photos of the two bedrooms from the real estate ad:

Upstairs in the back of the house

Upstairs in the front of the house
This is what they looked like when we moved in:

Upstairs in the front of house

Upstairs in the front of house

Upstairs in the back of house

Upstairs in the back of house

We were thankful for the beautiful hardwood floors throughout this house and we refinished all of them right before we moved in. Neither of these rooms had pink paint, another reason why we could wait as long as we did to renovate them. But, they did have the plain slab doors, small door casings and baseboards, and no crown moulding. We painted the ceilings and had the crown put in when we did most of the other rooms, within weeks of moving in. But, we held off on the baseboard and finishing the crown moulding until we were ready to dive in and fully complete these rooms. We also put the panel doors in when we were doing the rest of the upstairs so they would all match. But, we waited on the closet doors until we were ready to finish these rooms. And, we took advantage of a sale on wood blinds when we got the blinds for the master bedroom and put them in all of the upstairs windows at the same time. That also gave a better look on the outside of the house. No one could tell from the outside that the window casings didn't match the blinds and the rooms were not finished.

The first step was getting the trim work finished and the closet doors replaced. That went pretty quick and thankfully moulding designs stay around for many years, so you don't have to worry that the style you picked out won't be available when you get around to new rooms. It is one of the few items you can still count on like that. It is hard to believe, but people used to buy furniture, china, and silver a few pieces at a time over many years. Now, if you don't buy all the pieces you want right now, you won't find matching pieces ever again. Maybe on some china and silver, but really you'd be lucky to still find those patterns 5 years later and only if they were really popular. Anyway, I started the prep work on the back bedroom first since we decided to finish that one first. It made sense because we had all of the furniture and most of the accessories. It would be that much easier to get done and be ready for guests. And we had guests coming, so we set a hard deadline for ourselves.

Painting was the first step and Alan had to do all of that difficult sanding on the walls just like every other room in the house. We continue to be amazed that an entire house could have such a crappy paint job. You'd think you'd figure out how to avoid all those roller marks and drips eventually. Or, maybe an entire team of incompetent painters each did one room simultaneously. At least that would explain why there was no improvement. I knew I wanted to do a purple/gray color in the front bedroom, but I tried more paint colors than I ever have trying to find the right color for the back bedroom. I did have a rug already and needed to stay within that palette. And, turns out I don't have an unlimited palette that I like. There are only certain colors I like to see around me all the time. I ended up picking a green color that at first glance looks exactly like the master bedroom, which again at first glance looks like the kitchen. Apparently gray/green and beige/green are favorites of mine.

Once the room was painted, it was just a matter of decorating. We still aren't totally finished with the accessories, but here is how the back bedroom turned out:

The furniture was in our guest bedroom at our old house. The rug came out of our old dining room. And the loveseat, which is also a recliner, came out of our old family room.


We immediately started on the next guest bedroom. This time the color was easier to choose because I knew what I wanted, but I still must have looked at four samples before picking the final color. I also wanted this room to have a completely different feel. I patterned it a bit after the powder room downstairs. A little wild with some bling.


The bed and armoire came from our old master bedroom. We sold all the other pieces as we had upgraded the bed to king quite a few years ago, so we could sell a full set of furniture with bed and keep the second bed and the armoire to use as base pieces in a future guest room. Ended up working out like we planned.


We saw these chairs at Home Goods and bought one thinking that you only really need one crazy chair in a room. But, after an extensive search to find another chair that would work in the room, we gave up. We thought it would make sense to have matching chairs after all. We knew we were right when we went back to Home Goods about a month later and the other chair was still there. Guess we were the only ones that liked these chairs. Thank God.
Like the back bedroom, we still need a little more work on accessories and we keep threatening to paint the little table under the mirror silver and black, but the room works and it is finished enough that guests can enjoy it.

I'd about decided that I just wouldn't have any more posts on this blog because I just couldn't see us doing another project any time soon. But, even though we really don't have any more money for this house, we were triggered by Spring to once again want to get serious about the landscaping. So, we are getting bids on that project now. Next post I'll get started with that project. It won't get done as quickly as the other projects, but I am hopeful we can do it a section at a time so we can at least feel a little bit of accomplishment. That is one good thing about landscaping, you can tackle a big project a piece at a time and not feel like you are living in a construction site.

Monday, January 2, 2012

Afterthought

No matter how long or how often you do renovation projects, you don't always do everything right the first time. Sometimes you miss something. Or, you thought about it and decided against it for some reason that doesn't make sense to you later. Such was the case with the laundry room. After about of year of using it we determined that we really needed a light over the sink.

Seems like such common sense now, but I remember considering it and then dismissing it back when we were constructing the room. The room was made out of half of a hallway and two back-to-back closets. Both the hallway and one closet had overhead fixtures and we kept those, just changed out the actual fixtures. It almost seemed like overkill to have two lights in that small room. So, it just didn't seem necessary to have a light over the sink. It is ridiculous to me now that I thought about it that way.

So, we recently added the light over the sink. The ceiling joists didn't allow for a recessed fixture, which was our first idea. So, we went with a hanging fixture. Then, we had an outlet to the left of the sink, but the electrician didn't feel comfortable trying to add the wire in such a tight space with the glass tile that was around it. His solution was to put the switch at the door where the switch for the overhead lights was. But, I knew that would never work. When you are at the sink you want to reach over and turn on the light, not turn around and go back to the door to do it. So, we made a two-gang box where the old outlet was and this required that we tear out some of the glass tile and patch it. It was a bit of work on our part, but worth it and we had all of the extra tile and grout that we needed to do the job.

Here is how this turned out:


Getting a small, but very bright, incandescent hanging fixture proved difficult. But we found this one and it works great.

And you can't even tell that we tore out tiles and patched it.
The moral of this story is really think through what you need and want in the space and just do it. It never works as well to rethink it later and change things. And, even if it works as well, it is usually more expensive and more difficult.

Friday, December 30, 2011

Final(ly) Kitchen Reveal

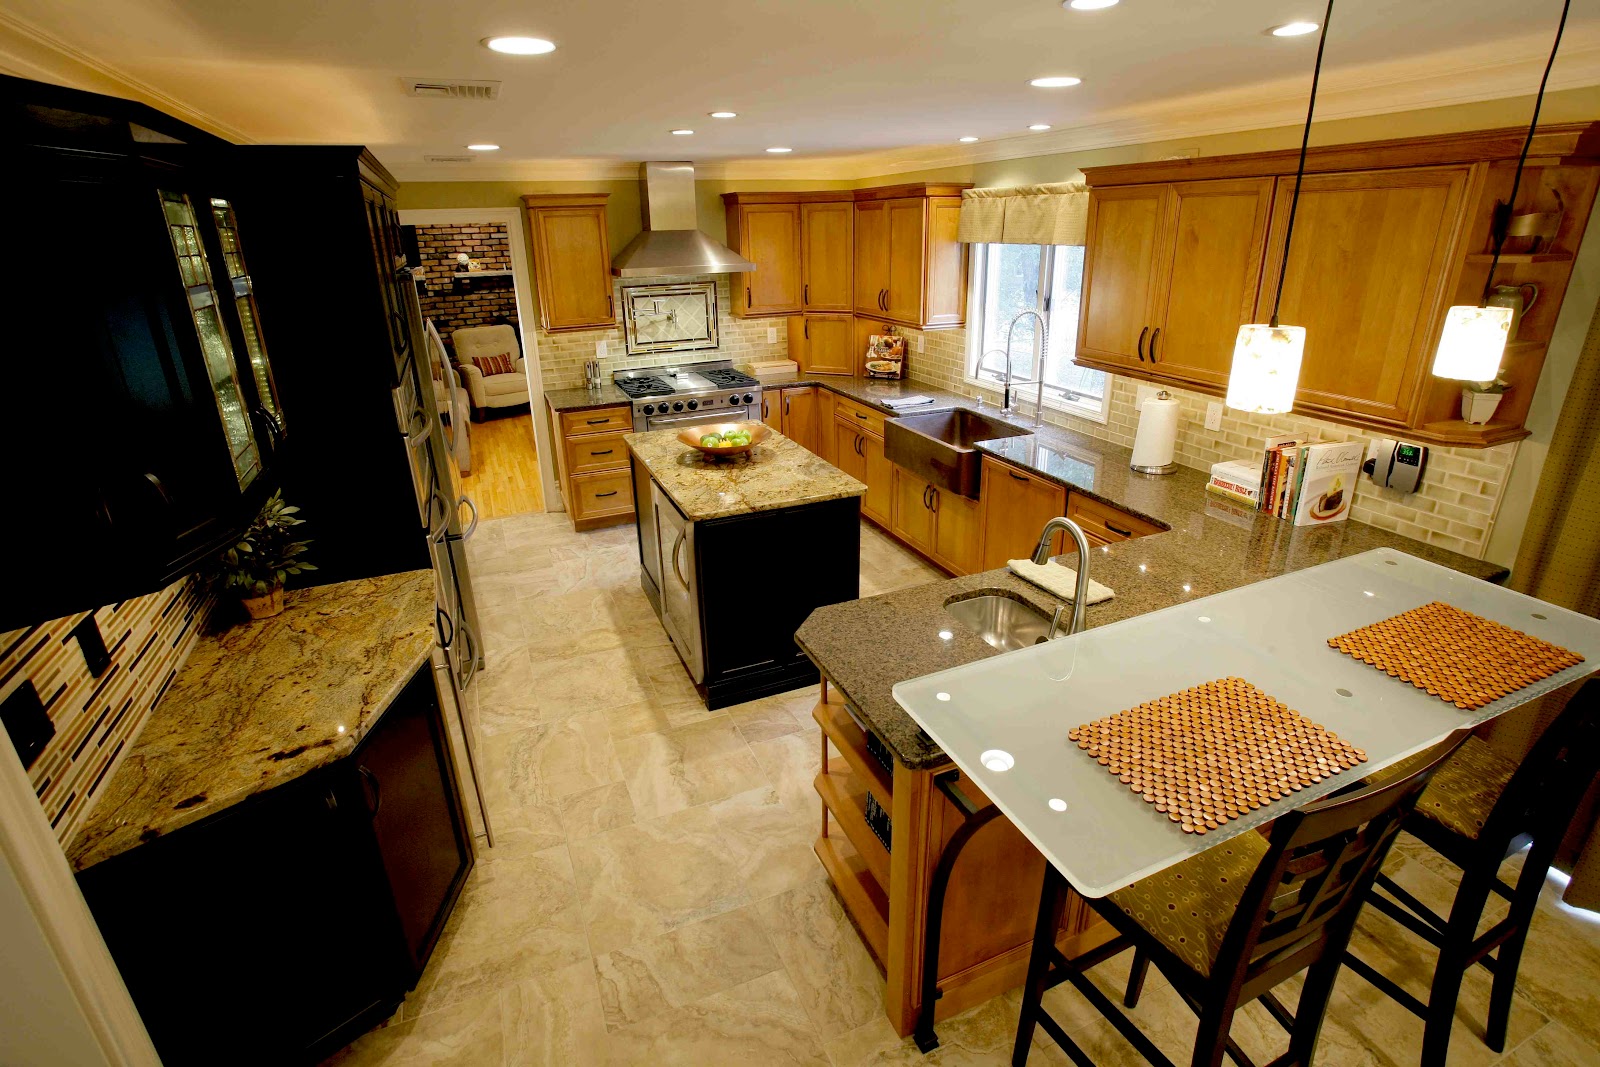
The kitchen took a really long time to complete. Way longer than the last kitchen we did and way longer than we expected. It really takes the fun out of it. Between the issues with the contractor, having to figure out some of the solutions ourselves, and then, of course, the flood, it was a difficult and stressful project. But, it all turned out great. It was a major transformation and it is good to look back at where we started. Remember these photos on the left from an earlier post? Now, on the right is where we ended up.

Before
After

Before
After

Before
After

Before
After

Before
After

Before
After


Before
After


Here are a few more shots of the finished kitchen:


Mixer stand is really convenient.


Still need to reupholster the chairs. Going to do a rust color. The chairs were cheap, so the reupholstery will cost more than the chairs, table, and bar stools put together. But, I never intended to leave the drab taupe microfiber on these chairs when I bought them. Sure wish I knew how to reupholster furniture. That would be a big savings.

Really enjoying the beverage center.

Glad we ended up doing the table and chairs instead of either an office desk or banquette. Provides maximum seating, traffic flow, and flexibility.
Once we finally finished the kitchen, we took a little time off. But, then we had the two guest bedrooms to do. While they did not require the construction, they did require a lot of work on our part and then the decorating. We are down to some details in those rooms, so I'll post those next.

The saga continues . . .